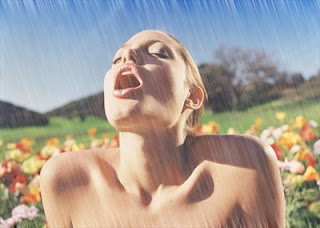
It's one of those days, when you have this kind of melancholic feeling and wish that it's raining outside but it's not. So, you pick a picture and decide to do a rain effect on it. Or maybe today your design theme is inspired by that Rihanna's song...'You can stand under my umbrella...ella..ella' and you have your model, an umbrella but sadly no rain. No matter what your situation is, this tutorial on
how to add rain effect to your photograph will help solve your problem and create more drama for your photo;)
These are the before and after images:
FINAL PREVIEW

1. Open your image.
2. Create a new layer. Layer > New > Layer. Set this layer mode to Screen.
3. Working with the new layer, Go to Edit > Fill. Use this setting:
Use: 50% Gray
Mode: Normal
Opacity: 100%
Leave the Preserve Transparency box unchecked.
4. Now, go to Filter > Noise > Add Noise. Use this setting:
Amount: Just leave the default setting. Mine is 2.03%
Distribution: Uniform
Check the monochromatic option.
5. Next, go to Image > Adjustment > Auto Level.
6. Then, go to Filter > Blur > Motion Blur. Set the angle and distance to your preference. Mine is -76 for the angle and 56 pixels for the distance.
7. Now, we're going to adjust the density of the rain. Go to Image > Adjustment > Level. In the input level chart, slide the black and white slider until you get your desired density.
8. If the rain appear too sharp, go to Filter > Blur > Gaussian Blur. Adjust the radius to your liking. Not too high though. Mine is just 0.6 pixel.
9. One final step...Adjust the opacity of the rain layer until you get the perfect rain. And there you go, you've done your first rain effect in Photoshop.


No comments:
Post a Comment